Showing posts with label Garlic. Show all posts

Wednesday, January 7, 2015

Recipe (Re)creation: Cauliflower "Fried Rice"


This delicious dish was inspired by two variations I came across this month here and here.  I love the idea of using January to clean up your act and your diet.  This mock fried rice dish allows you to cleanse your system while eating something totally satisfying and hearty.  My favorite part of fried rice is always the little bits of fluffy egg, so that was a must and I also wanted to incorporate lots of veggies so I added rainbow carrots, zucchini, and kale.  I cannot tell you how excited I am to have discovered this winning combination.  The cauliflower is the perfect substitute for rice and makes the dish oh-so-healthy.  Your body and soul will thank you for this one.

Serves 2

  • 1 head of cauliflower, florets separated
  • 3 tsp. toasted sesame oil
  • 1 cup carrots, chopped
  • 1 cup zucchini, diced
  • 2 tsp. ginger, peeled and chopped
  • 1 clove garlic, finely chopped
  • 2 tbsp. sliced scallions
  • 2 eggs, lightly beaten
  • 1 cup kale, shredded
  • 1-2 tbsp. tamari
  • Sea salt, to taste

Directions:

-Pulse the cauliflower in a food processor until it resembles couscous.
-Meanwhile, heat the sesame oil in a large skillet over medium high heat.
-Add the carrots and cook for 3 minutes, adding a splash of water to prevent sticking.
-Add the zucchini and a pinch of salt and cook for another 2 minutes.
-Next, add the eggs and stir frequently until almost set.
-Add the garlic, ginger, scallions, kale and cauliflower and cook another 2-3 minutes.
-Remove from heat, drizzle with tamari and season with sea salt.
-Enjoy immediately.

Tuesday, September 23, 2014

Recipe (Re)creation: Butternut Squash, Kale + Manchego Pizza


You can think of this one as the ultimate harvest pizza.  As fall is upon us and the leaves are starting to change, I begin to crave all my favorite fall and winter veggies. Roasting vegetables and throwing them in pastas, salads, and soups is always a delicious option, so why not throw them on pizza? I found this delectable recipe here and made a few changes to suit my tastes.  I love manchego cheese, so I used that instead of fontina, and omitted the salsa.  I also cheated and used store bought pizza dough from Whole Foods.  While I do love the idea of making the dough from scratch, it just isn't realistic for me on a weeknight.  Otherwise, I stuck to the original recipe and just love how this pizza turned out.  Happy eating!

Serves 2

Ingredients:

  • 7 oz. pizza dough
  • 1 head of garlic
  • 2 tbsp. butter
  • 1 1/2 cups butternut squash, cubed
  • 1 tbsp. brown sugar
  • 6 sage leaves
  • 1 tbsp. pine nuts
  • 2 tbsp. grated parmesan cheese
  • 4 tbsp. olive oil
  • 8 oz. shredded manchego cheese
  • 1 small bunch of kale, torn

Directions:

-Preheat oven to 400 degrees F and remove pizza dough from fridge.
-Cut 1/4 inch off the top of the garlic and place in tin foil.
-Drizzle with olive oil and roast in the oven for about 40 minutes.  
-Meanwhile, heat butter in a medium skillet and add the butternut squash.
-Sprinkle with brown sugar and cook, stirring often, for about 20 minutes. 
-Remove from heat, season with salt and pepper, and set aside.
-Once the garlic is tender, remove from the oven and let cool.
-Preheat oven to 450 degrees F for the pizza. 
-Place the sage, pine nuts, 4 cloves of garlic, 3 tbsp. olive oil and 1 tbsp. parmesan cheese in a food processor and blend until a thick pesto is formed. 
-Knead the dough and form it into a flat disk about 12 inches wide.  
-Place on a greased baking sheet lined with tin foil.
-Brush the dough with olive oil and spread evenly with pesto.
-Top with shredded manchego, then add the butternut squash, and top with more manchego.
-Place pizza in the oven and bake for about 10 minutes.
-Meanwhile, place kale in a bowl and toss with 1 tbsp. olive oil and 1 tbsp. parmesan.
-Remove pizza from oven, top with kale, and bake for another 5-6 minutes.
-Once the pizza is done and the kale is crispy, remove from oven.
-Allow to cool, cut into slices and serve immediately. 


Monday, July 7, 2014

Recipe (Re)creation: Green Gazpacho with Marcona Almonds


This creation was inspired by a lovely marcona almond gazpacho I had at Contigo recently.  While mine is not a white gazpacho, I did decide to add marcona almonds to a more traditional green gazpacho.  I adapted a recipe that I came across in Bon Appétit and the final result will not disappoint.  Serve as an appetizer or as a light lunch.  It is the perfect chilled summer soup!

Serves 4

Ingredients:

  • 1/3 cup marcona almonds, plus more for serving
  • 1/4 cup white wine vinegar
  • 1 lime, juiced
  • 1 cup plain greek yogurt
  • 1/2 cup olive oil, plus more for drizzling
  • 2 1/2 cups ciabatta, torn and crusts removed
  • 1 medium cucumber, peeled and cubed
  • 1 green bell pepper, chopped
  • 4 tomatillos, husked and sliced
  • 4 scallions, sliced
  • 2 jalapeños, seeds removed and chopped
  • 1 clove garlic, chopped
  • kosher salt

Directions:

-Whisk together the vinegar, lime juice, yogurt, and 1/2 cup oil in a bowl.
-Add the bread, cucumber, bell pepper, tomatillos, scallions, jalapeños, garlic & almonds.
-Toss to coast, cover, and chill in the refrigerator for at least 4 hours.
-Purée the mixture in a Vitamix or high powered blender until very smooth.
-Transfer to a large bowl and season with salt, as needed.
-Ladle soup into bowls, drizzle with olive oil, and top with the remaining almonds.

Enjoy!


Thursday, August 22, 2013

Recipe Creation: The Perfect Grilled Artichoke


Artichokes are tough.  Seriously.  I have failed many a times trying to cook these perfectly.  If you just grill them, they are too tough and if you just steam or boil them, you don't have those beautiful grill marks and charred flavor.  So, I decided to do both!  I was trying my best to (re)create my favorite grilled artichoke at Lolinda and I don't think you'll be disappointed!  In terms of serving the artichoke, I prefer serving it with Lemonaise (lemon aioli) or melted butter, but you can also make extra garlic oil and dip it in that too.  The best thing about artichokes is that they are delicious AND fun to eat ; )

Serves 2

Ingredients:

  • 1 artichoke
  • 1/2 lemon, cut into wedges
  • 1/4 cup olive oil
  • 2 cloves garlic, finely chopped
  • Salt & pepper, to taste

Directions:

-Preheat the grill to 400 F.
-Fill a large bowl with cold water and add a wedge of lemon.
-Meanwhile, bring a large pot of water to boil.
-Trim the artichoke and cut it in half.
-Immediately place the artichoke halves in the cold lemon water.
-Remove halves momentarily to scoop out the fuzzy center of each artichoke.
-Place artichokes in the pot and boil for 15 minutes.
-In a small bowl, mix the oil, remaining lemon juice, and garlic together in a bowl.
-Season the olive oil & garlic mixture with salt and pepper, to taste.
-Remove the artichokes from the boiling water and brush with the garlic mixture.
-Place on the grill, flat side down, for 5-8 minutes.
-Remove from grill and serve with aioli, butter, or more garlicky olive oil.

~Enjoy~

Monday, November 12, 2012

Restaurant (Re)creation: La Ciccia's Spaghetti with Bottarga


La Ciccia is a cozy little Sardinian gem in Noe Valley.  Though it may appear unassuming from the outside, the food will blow you away.  Reservations at La Ciccia are highly coveted and tricky to get, so try for an early or late dinner on a weekday.   If you do have the luck of snagging a resie, you absolutely must get the spaghetti with bottarga.  I was skeptical at first since the thought of salted mullet roe on pasta didn't really appeal to me, but it surprisingly doesn't taste fishy in the slightest.  It actually just adds a unique, salty, and creamy dimension to the spaghetti.  After my first bite, I decided this definitely needed to be added to my (re)creation list.  The most difficult part of making this dish is procuring the bottarga.  I went to numerous gourmet and specialty stores and struck out.  I ended up finding it online, but if you live in San Francisco, you may be able to find it at Lucca in the Marina or at Bi-Rite in the Mission.  Once you get your hands on the bottarga, the rest is a breeze.  Credits go to La Ciccia for sharing this DELICIOUS treat!

Serves 4

Ingredients:

  • 4 tbsp bottarga (grey mullet roe)
  • 1 lb spaghetti
  • 6 tbsp olive oil
  • 1-2 cloves garlic, thinly sliced
  • 1/2 bunch italian parsley, chopped
  • 1 tsp red pepper, crushed
  • salt

Directions:

-Fill a medium pot with water and a sprinkle of salt.
-Bring to a boil and add the spaghetti.
-In a small saucepan, sauté the garlic and crushed red pepper in olive oil over low heat.
-Once the garlic is fragrant, stir in half of the bottarga, and remove from heat.
-When the pasta is cooked al dente, strain, and then add the pasta to the saucepan.
-Mix in the rest of the bottarga with the pasta and sprinkle with parsley.
-Enjoy immediately with a generous glass of Vermentino.

La Ciccia
291 30th St.
San Francisco, CA
(415) 550-8114
www.laciccia.com

Thursday, November 1, 2012

Recipe (Re)creation: Na'ama's Fattoush


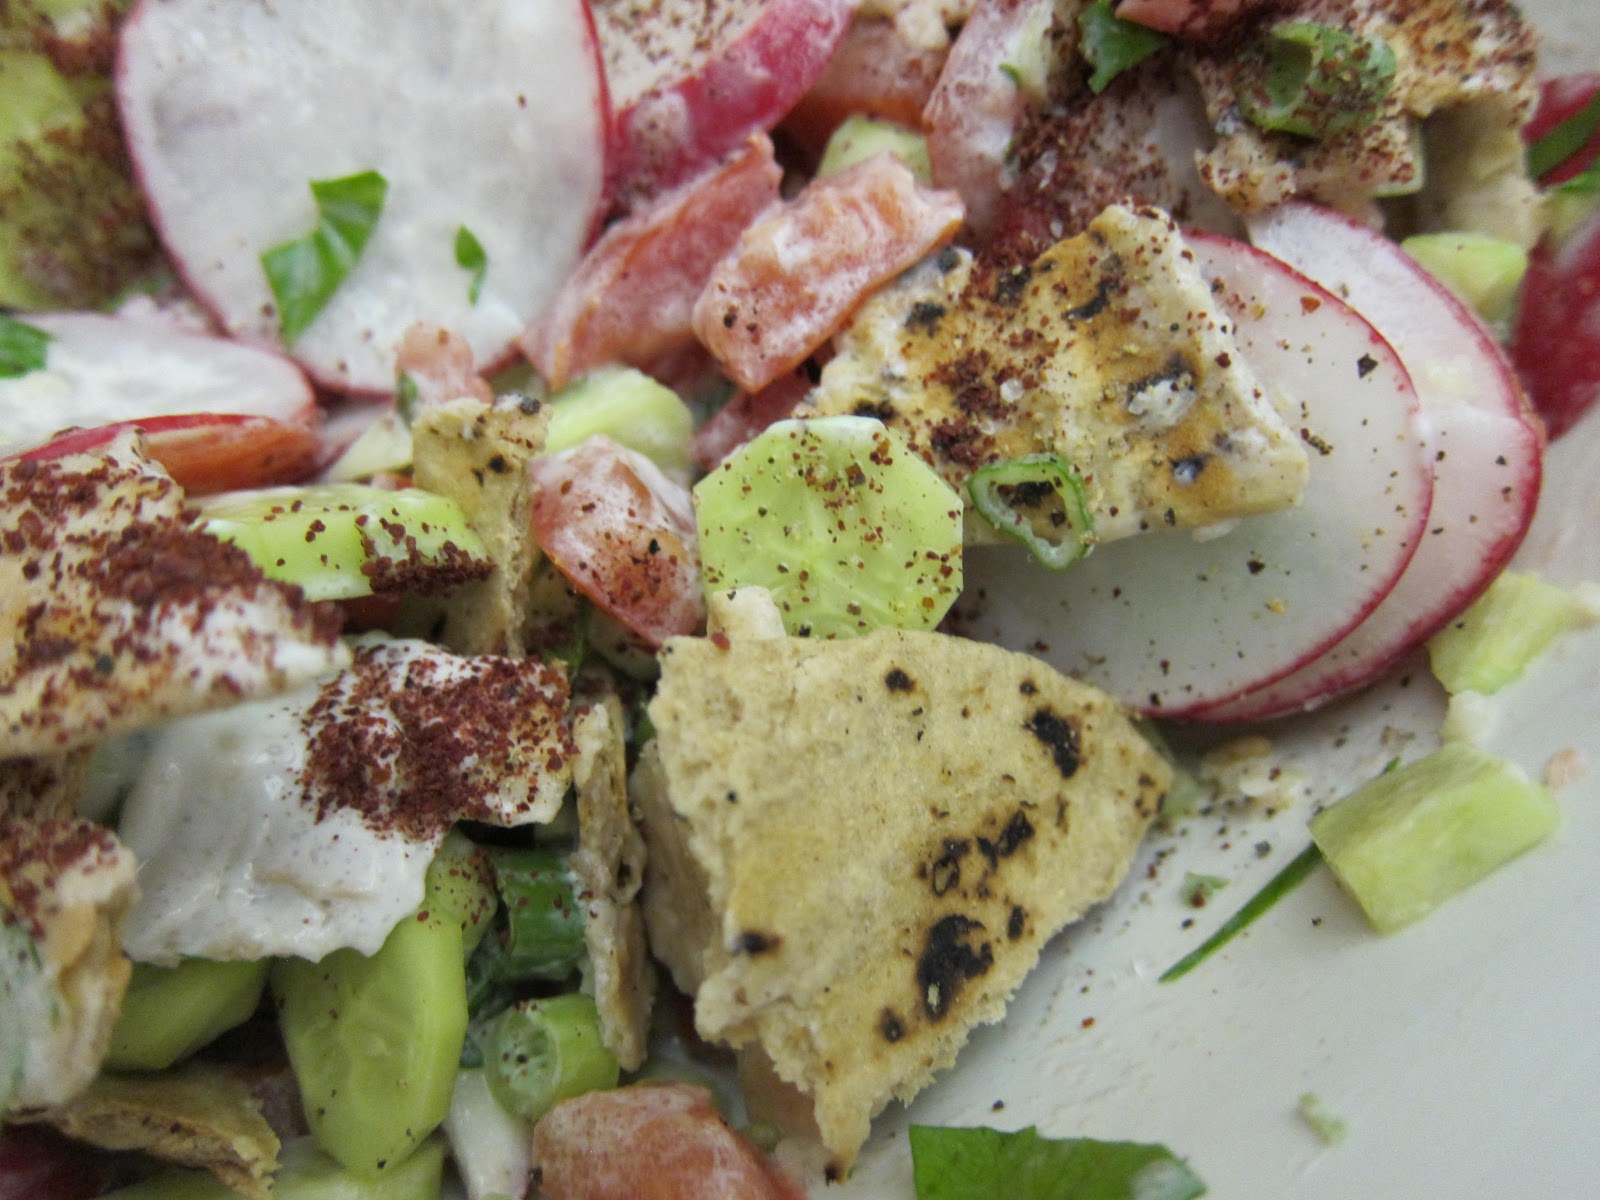
This recipe is from Ottolenghi and Tamimi's long-awaited cookbook, Jerusalem.  I never thought I'd say it, but I like this cookbook even more than Ottolenghi's other cookbook, Plenty.  This one features both Jewish and Arab dishes, and there are both vegetarian and meat-laden dishes to keep just about everyone happy.  This fattoush salad reminds me of my trip to Lebanon and fattoush was one of my absolute favorite discoveries from the trip.  This recipe is delicious as is, but I just added a few twists to make it slightly more satisfying.  I used pita instead of naan and I toasted it so that it kept its integrity and didn't get soggy.  I also topped the salad with a little crumbled feta for some added salt and creaminess.  You can serve this salad with some grilled sausage or extra pita and hummus and you are all set for a perfect weeknight meal.

ps. Buy the Jerusalem cookbook- you won't regret it.

Serves 3-4

Ingredients:

  • 3/4 cup Greek yogurt
  • 1/2 cup milk
  • 2 large pitas, toasted
  • 3 large tomatoes, diced
  • 4 radishes, thinly sliced
  • 3 mini cucumbers, peeled and diced
  • 2 green onion, sliced thinly
  • 5 mint leaves
  • 1/2 bunch flat-leaf parsley, chopped
  • 2 cloves garlic
  • 3 tbsp lemon juice
  • 1/4 cup olive oil
  • 2 tbsp white wine vinegar
  • 1 tbsp sumac
  • 1/4 cup crumbled feta (optional)
  • salt & pepper

Directions:

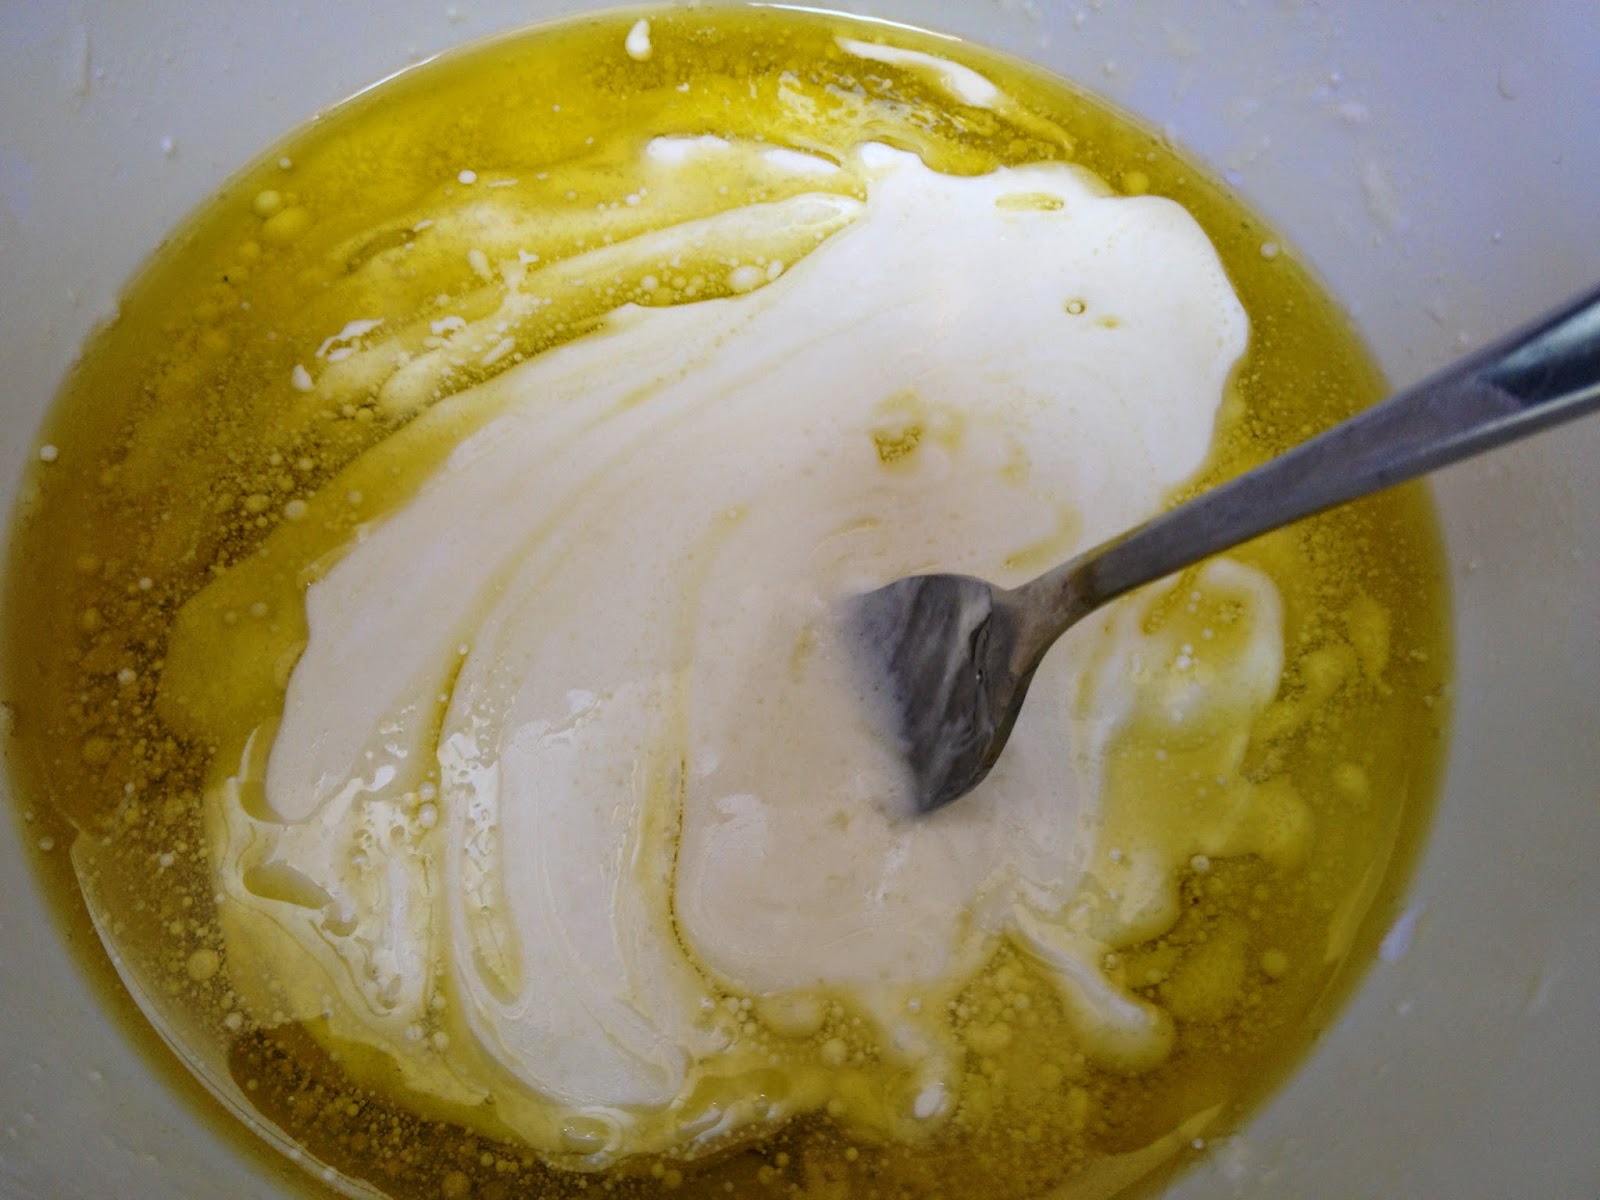
-To make the buttermilk dressing, start 1 hour in advance.
-Whisk the milk and yogurt together in a bowl.
-Set aside, or place in the fridge until bubbles form to the surface.
-Tear the bread into bite-sized pieces and place in a large mixing bowl.
-Add the buttermilk dressing, and all the other ingredients and mix well.
-Allow flavors to mix for 10 minutes and then spoon the fattoush into serving bowls.
-Drizzle with olive oil and season with salt & pepper.
-Garnish generously with sumac and a sprinkle of feta cheese.

~Enjoy~

Sunday, September 16, 2012

Restaurant (Re)creation: Tartine's Kale Caesar


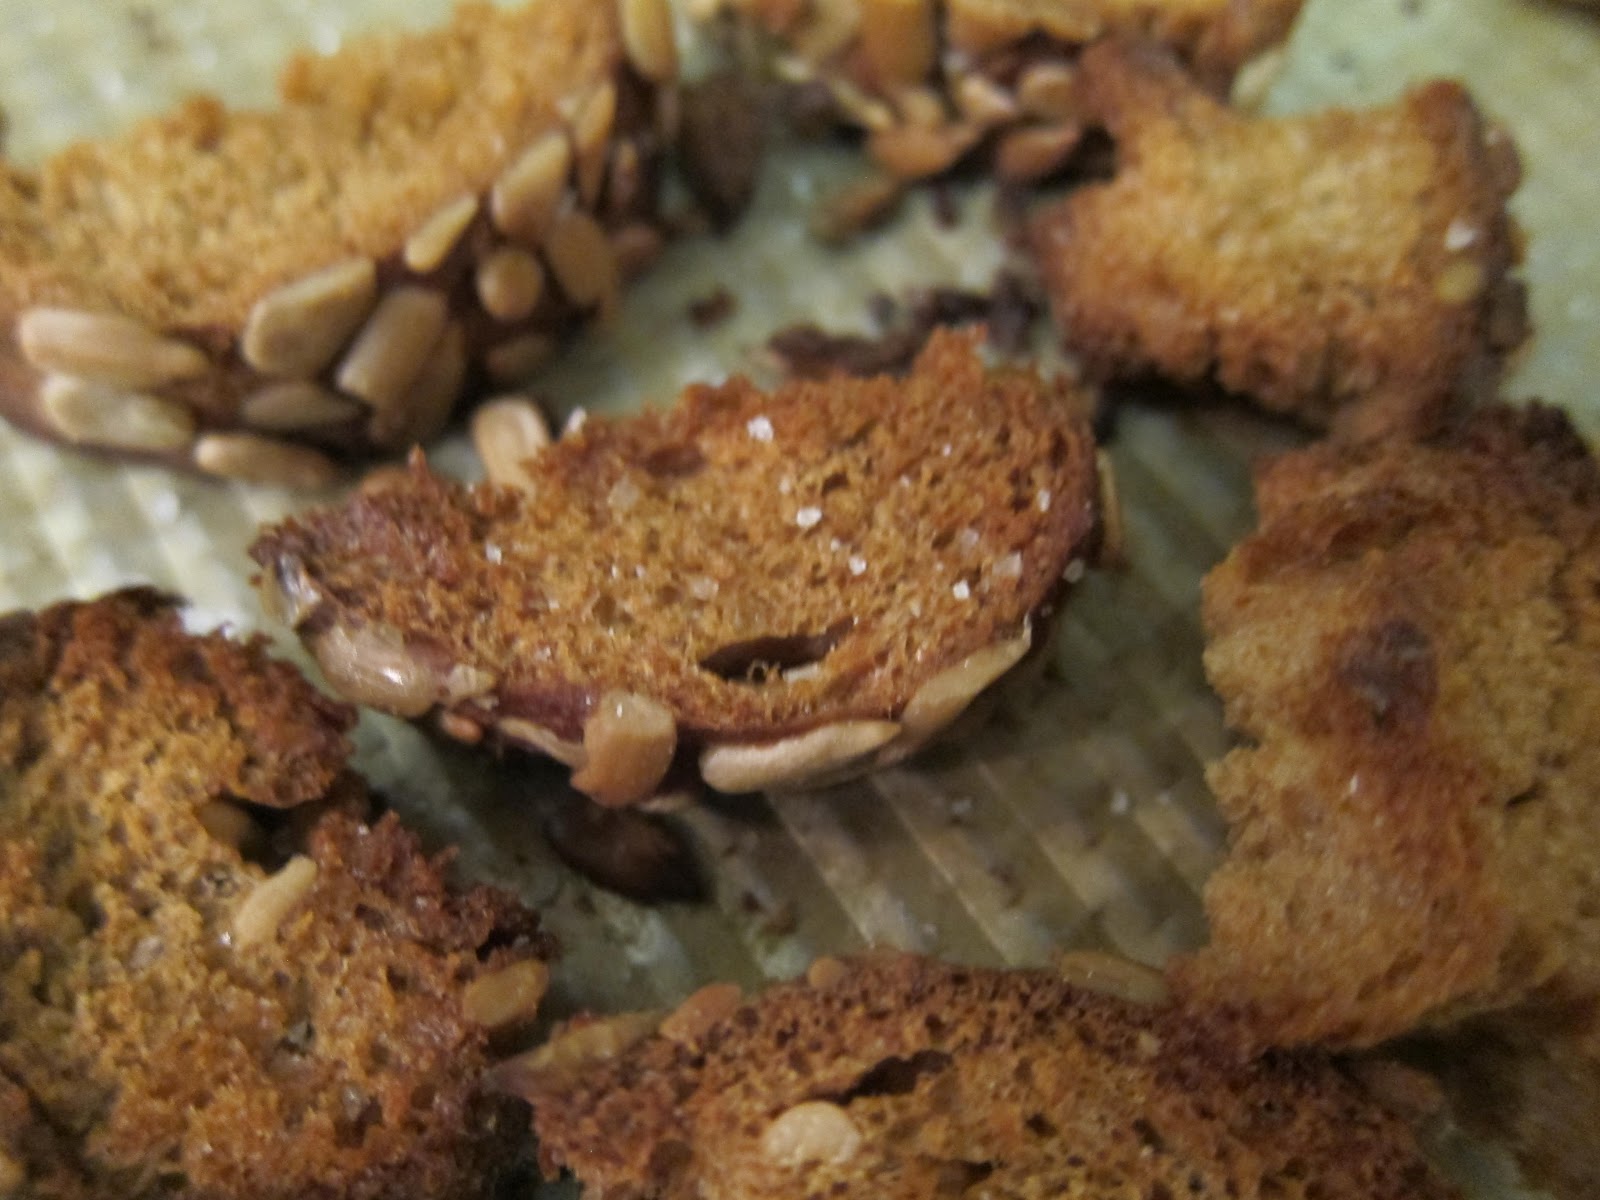
The bread at Tartine Bakery is legendary and sells out within an hour almost every day.  While I LOVE their bread, I am still of the mindset that I would rather buy it than make it.  So buy it I do!  The best part is, you don't have to eat it all in one day one at the risk of having to throw it out once it is no longer fresh.  Their day-old bread is perfect for homemade croutons.  Really any day-old high quality bread will do.  These croutons pair perfectly with most salads, but especially this kale caesar below.  I just got Red Russian Kale delivered in my vegetable box from Albert & Eve and it was the perfect incentive to try out this recipe.  I got it straight from The Tartine Bread Cookbook, and made just one small change.  I used fewer anchovies in the dressing than the recipe calls for, since I'm not a huge anchovy fan, but other than that, it's true to the original.  The recipe is fairly simple, healthy, and the perfect addition to a weekday meal.  Plus, you don't have to wait in long line at Tartine to enjoy this- you can have it in the comfort or your own kitchen.  What could be better?

Serves 4-6

Ingredients

For the croutons:

  • 4 slices day-old country bread (or any rustic baguette)
  • 2 tablespoons olive oil
  • salt

For the Caesar dressing:

  • 2 lemons
  • 3 cloves garlic, diced
  • 5 olive oil-packed anchovy fillets
  • 1 large egg yolk
  • Salt
  • 2 cups olive oil

For the salad:

  • 2 lbs kale, center stem removed
  • 2/3 cup shaved aged parmesan

Directions


Preheat the oven to 400 degrees F.  Tear bread into 1 1/2 inch chunks and toss with olive oil and a pinch of salt.

Spread the bread evenly on a baking sheet and bake for about 12 minutes, or until golden brown.  Remove from head and set aside.

To make the dressing, grate the zest from 1 lemon.  Put the garlic, anchovies, and lemon zest in a mortar and pestle and pound to make a thick paste.

Add the egg yolk, a pinch of salt, and a squeeze of lemon juice and stir to combine.  While stirring, pour in 1/2 cup of the oil a little bit at a time.  The mixture should look smooth and creamy.  Continue adding the oil as you stir until the dressing thickens, adding squeezes of lemon periodically.  Add salt and lemon juice to taste and add water (one spoonful at a time) until dressing thins to the consistency of heavy cream.

Combine kale and croutons in a large bowl.  Pour the dressing over the kale and toss.  Top with Parmesan and serve immediately.

Enjoy!

Tartine Bakery
600 Guerrero Street
San Francisco, CA
(415) 487-2600
www.tartinebakery.com

Tuesday, March 20, 2012

Restaurant (Re)creation: Zuni's Roasted Chicken + Bread Salad


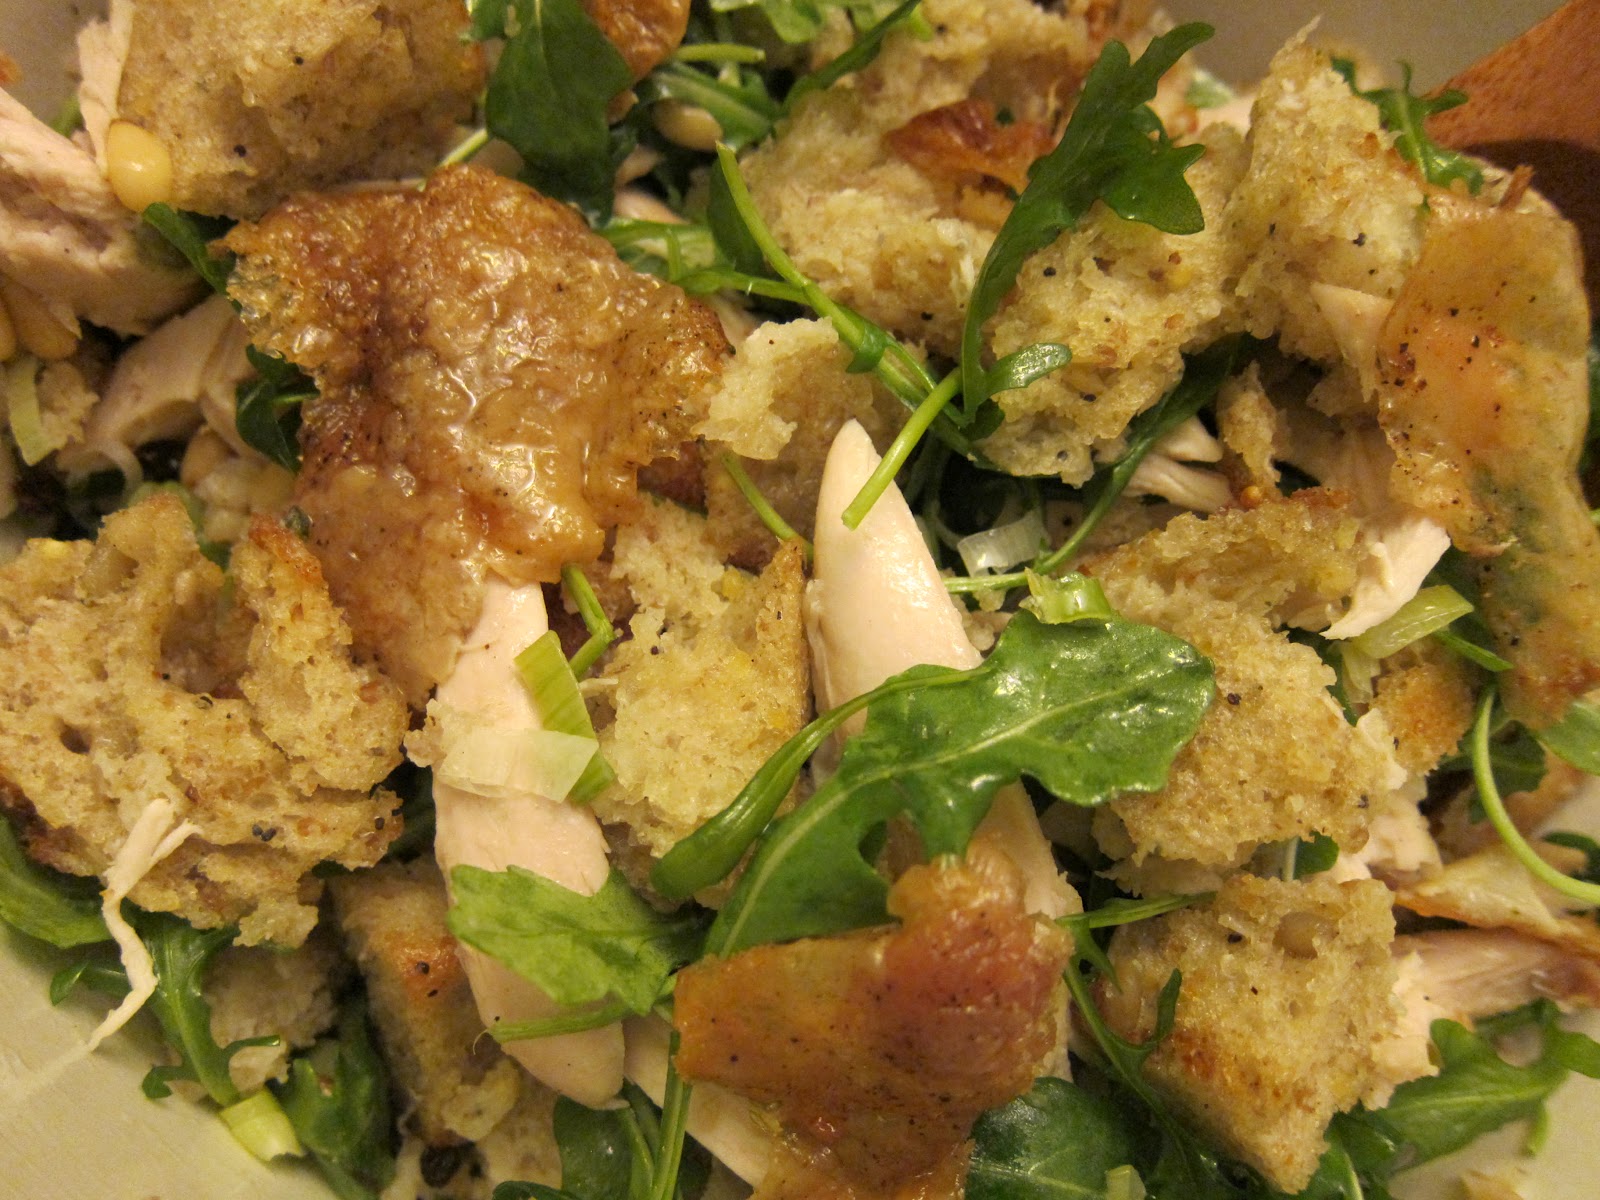
Zuni Cafe is a San Francisco institution and their roasted chicken is hands-down the most popular item on the menu.  The dish serves two and takes about an hour to an hour an a half to arrive, but it is fabulous and definitely worth the wait.  This recipe is based on an adapted version of the original from the Zuni Cafe Cookbook by Judy Rodgers.  The original recipe is wonderful, but very wordy and time-consuming.  This adaptation should save some time, and if done right, should be equally mouthwatering and enjoyable. You can serve the chicken with the bread salad recipe below or you can swap it out and serve it with the brussels sprout and butternut squash panzanella salad from my prior post.  Either will be delicious.  Let me know how it turns out ; )

Serves 2-4

Ingredients for chicken:

  • 1 small chicken (2 3/4 to 3 1/2 pounds)
  • 4 tender sprigs of Thyme
  • 3/4 teaspoon salt
  • A little water

Ingredients for bread salad:

  • 8 ounces torn peasant-style bread (crusts removed)
  • 6 to 8 tablespoons mild-tasting olive oil
  • 1 1/2 tablespoons white wine vinegar
  • Salt & pepper to taste
  • 1 tablespoon dried currents, soaked in 1 tbsp each of red wine vinegar & warm water
  • 2 tablepsoons pine nuts
  • 2-3 garlic cloves, slivered
  • 1/4 cup sliced scallions
  • 2 handfuls of arugula

Directions:

Day 1

-Remove and discard the lump of fat inside the chicken.  Wash the chicken and dry thoroughly.

-Gently slide a finger under the skin of each breast and create two small pockets.  Do the same under the skin of each thigh.  Stick a sprig of thyme in each of the 4 pockets.

-Season both sides of the chicken thoroughly with salt and pepper.

-Cover the chicken and put it in the refrigerator overnight (seasoning the chicken a day before makes it more flavorful and moist- its worth it).

Day 2

-Preheat oven to 475 F.  Place a 10 to 12-inch skillet with an all-metal handle over medium heat on the stove.  Wipe the chicken dry and place in the skillet, breast side up (the pan should sizzle).

-Next, place the the skillet in the oven and let it brown for about 30 minutes.  The skin should begin to blister.

-Meanwhile, toss torn bread pieces (about 2-inch chunks) in about 2 tablespoons of olive oil, lightly coating them.  Place them in a baking dish in the oven on a rack below the chicken and cook for about 10 minutes, or until brown, then remove from heat. (If you want to toast your pine nuts, you can place the pine nuts in the with the torn bread chunks, but watch them closely because they burn quickly.) 

-Turn the bird over and roast for another 10-15 minutes, depending on the size of the bird.  Then flip back over so the breast side is up and recrisp for another 5-10 minutes.

-Remove the chicken from the oven once it is crisp and browned.

-Turn off the oven and set the chicken on a plate to cool.  Pour the fat from the skillet, leaving the lean drippings behind.  Add about a tablespoon of water to the drippings and warm them over medium heat to soften any hard drippings.

-Combine 1/4 cup of olive oil with white wine vinegar and salt and pepper to taste.  Toss half of this vinaigrette with the torn bread in a medium sized bowl.

-Meanwhile, heat some olive oil over medium-low heat in a small skillet and add the garlic and scallion slivers.  Stir constantly until softened, but not browned.  Remove from heat and toss with the bread.  You can add the drained currants and the pine nuts to the bread salad at this time as well.

-Place the bread salad in an oven-safe dish and warm in the oven while you finish preparing the chicken.

-While the bread salad is warming, tear the chicken into pieces, some large and some small.  Make sure to include the crispy pieces of skin (its the best part).

-Remove the bread salad from the oven and place on a platter over a handful or two of arugula.  Drizzle the remaining vinaigrette and a spoonful or two of pan drippings over the salad, mixing well.  Top the bread salad with crispy pieces of chicken.

Heaven.


Zuni Cafe
1658 Market Street
San Francisco, CA
(415) 552-2522
www.zunicafe.com

Tuesday, February 14, 2012

Restaurant (Re)creation: Kokkari's Grilled Lamb Chops and Roasted Potatoes


~ From top: Lamb chops on the BBQ, Perfectly Grilled Chops,
(Re)creation plated and ready to be devoured ~

If you know kiwis (like my husband), you know they love their lamb.  I was racking my brain for the perfect dish to serve on Valentine's Day and then it came to me: grilled lamb and potatoes!  (I mean, what guy wouldn't love that combo?)  Kokkari is very well known for their lamb so I decided to use a recipe from the Kokkari Cookbook that I recently bought.  This recipe is simple and requires very little time.  While it may look like a lot of ingredients, many are repeated in each preparation, so you don't have to buy very many items.  Perfect for a weeknight Valentine's Day meal.  (And yes, the kiwi thoroughly enjoyed it).

Serves 4 (generously)

Ingredients for lamb: 
  • 2 8-rib racks of lamb, trimmed and cut into single rib chops
  • 2 tsp garlic powder
  • 1/2 tsp freshly ground pepper
  • 2 tsp dried oregano, crumbled
  • 2 tablespoons olive oil
  • Sea salt
  • 2 lemons, cut in wedges
  • Fresh Oregano springs for garnish, optional

Ingredients for potatoes:
  • 3 large Yukon Gold potatoes, each peeled and cut lengthwise into 6 wedges
  • 4 tablespoons extra-virgin olive oil
  • 1/2 tsp dried oregano
  • 1/4 cup fresh lemon juice
  • Sea salt and ground pepper

Ingredients for Kokkari Dressing:
  • 6 tbsp extra-virgin olive oil
  • 2 tbsp fresh lemon juice
  • 2 tsp capers, rinsed and minced
  • 2 tsp minced shallets
  • 1 tsp minced garlic
  • 1 tsp minced flat-leaf parsley
  • 1/2 tsp chopped fresh oregano 
  • 1/4 tsp dried oregano
  • Sea salt and fresh ground pepper
  • (Optional: bunch of arugula)

Directions:

Preheat the oven to 450 degrees F.  

Put the potatoes wedges in a large bowl and toss thoroughly with olive oil, oregano, salt and pepper.  

Arrange the wedges in one layer a non-reactive baking dish.

Drizzle with lemon juice and 1/2 cup of water around (not on) the potatoes.

Bake for 20 minutes, then rotate the pan and bake for another 20 minutes (or until potatoes are browned and the water has evaporated.  

Remove from heat and let cool for at least 15 minutes.

Meanwhile, preheat grill on high (for lamb).

Put the lamb chops on a work surface and pound with your fist until it is evenly thick.  

Combine the garlic powder, pepper, and oregano in a small bowl.  

Press the seasoning blend on both sides of the meat, including the meat on the bones.  

Before grilling, drizzle olive oil on the seasoned chops, using your fingers to coat the meat evenly.  Season with salt.

Grill the chops, turning once, for about 3 minutes on each side (for medium rare). 

While the chops are cooking, whisk together the dressing ingredients.

Squeeze 2 lemon halves over the chops before taking them off the grill.

Serve the chops hot with a side of potatoes and a bunch of arugula (optional), all drizzled with dressing.

Garnish with lemon wedges and oregano sprigs.

Kali orexi (enjoy)


Kokkari
200 Jackson Street
San Francisco, CA
(415) 981-0983


Wednesday, February 1, 2012

Restaurant (Re)creation: Delfina's Spicy Cauliflower


This dish is a favorite at Pizzeria Delfina.  Its unique, spicy, crunchy and satisfying.  I actually found the real recipe from an SFGate article online (which is totally delicious as is), but I decided to do a somewhat "lighter" version.  I used all the same ingredients as Delfina's version, but I omitted the Calabrese peppers and I roasted the cauliflower first to minimize "frying" time.  This may go against the goal of most of my (re)creations since it adds time to the preparation, but I would rather add minutes to the cook time than inches to the waistline!  (I mean seriously, if a girl is going to eat like this most nights, she needs to make a few tweaks here and there to keep her pants fitting ; ).  So, I roasted the cauliflower (rather than deep frying it) and then just finished it off on the stovetop.  It tastes almost exactly the same as the restaurant version and only takes a little more time.  Try the recipe either way- both are perfectly delicious and flavorful.

Serves 4 (as a side)

Ingredients:

1 head of cauliflower, broken into florets
Extra-virgin olive oil
Salt, to taste
1/4 cup chopped italian parsley
1/4 cup drained capers, dried
2 large garlic cloves, sliced thinly (lengthwise)
1 tsp chili flakes
1 tbsp panko breadcrumbs

Directions:

Preheat the oven to 400 degrees F.

Separate the cauliflower into large uniformly-sized florets.

Place the cauliflower in an oven and stove-top safe pan and douse in olive oil and salt.  Mix the cauliflower around so that the salt and olive oil are evenly distributed.

Roast the cauliflower for 25-30 minutes or until it starts to soften and brown.

Once the cauliflower starts to brown, remove it from the oven and place it on the stovetop on medium heat.  Cook for 5-7 minutes.

Add a little more oil (as needed) and the capers, garlic, and breadcrumbs.  Cook for 1-2 more minutes, adding the chili flakes at the end.

Remove from heat and serve.

Enjoy!


Pizzeria Delfina (Mission)
3611 18th Street
San Francisco, CA
(415) 437-6800

Pizzeria Delfina (Pacific Heights)
2406 California Street
San Francisco, CA
(415) 440-1189
www.delfinasf.com

Sunday, January 29, 2012

Restaurant (Re)creation: Delarosa's Spicy Meatballs


~From top: close-up of a pretty little meatball, 
meatballs simmering in the spicy tomato sauce, the finished (re)creation~

She asks and she shall receive. I had multiple requests to sleuth out the secret to this popular dish and I'm so happy I did. This recipe is straight from chef Ruggero Gadaldi himself after I sent him a recipe request, realizing it was probably a shot in the dark.  Not only did he provide the recipe, but he even followed up with details about the spices used in his signature tomato sauce.  Now that is impressive customer service! It also allowed for a seamless (re)creation.  The meatballs turned out tender and moist and the sauce had a great kick. I ended up halving the recipe when I made it and it turned about beautifully.  It can easily be halved or multiplied depending on the number of stomachs you are feeding.  Don't forget to serve the meatballs with grilled ciabatta- its perfect for soaking up that delicious spicy tomato sauce. You may even be tempted to lick the plate.

Serves 6-8 (about 20 meatballs)

Ingredients:

For Meatballs:
1 lb ground veal
1 lb raw sweet italian sausage (casings removed)
2 cups bread crumbs (I used panko bread crumbs, also available in a gluten free version)
3/4 cups milk (whole or low fat)
4 cloves chopped garlic
1/2 bunch finely chopped fresh italian parsley
3 egg whites
1/2 cup freshly grated pecorino cheese
2 tbsp tomato paste
Kosher salt and freshly ground black pepper

For Spicy Tomato Sauce:
2 jars of marinara sauce (24 oz each)
1-2 tsp chili flakes (depending on how spicy you want it)
Chopped parsley

Optional: Grilled Ciabatta (for dipping)

Directions:

Preheat oven to 350 degrees.

In a large mixing bowl, combine all the meatball ingredients and mix thoroughly.

Let rest for 10 minutes in the refrigerator before shaping into balls.  

Before creating balls, put a little bit of olive oil on your hands to minimize sticking.  

Spoon out mixture and create meatballs that are approximately 1 1/2-inch balls.  

Place meatballs on a greased sheet pan and cook in the oven for 30 minutes (inside temp should be 155 F when done).

Meanwhile, heat the tomato sauce and chili flakes in a medium/large saucepan.  

Place meatballs in the spicy tomato sauce and simmer for 7-10 minutes.  

Sprinkle with parsley and serve with slices of grilled ciabatta.

Enjoy!


Delarosa
2175 Chestnut Street
San Francisco, CA
(415) 673-7100
www.delarosasf.com